Fritzing is an open-source electronics design program used for visually prototyping electronic systems. The output from Fritzing can be used to create PCB layouts that will subsequently be produced as physical boards. The creators of Fritzing state that it is made “in the spirit of Processing and Arduino” and is intended to “support designers, artists, researchers and hobbyists to take the step from physical prototyping to actual product.”
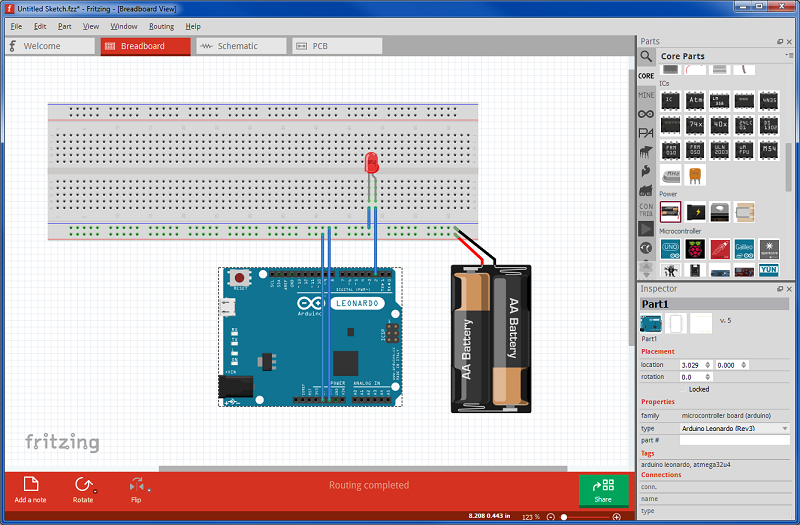
A typical view in the breadboard mode of Fritzing.
One of the issues with visual prototyping software is the need for graphical representations of the individual parts. Fritzing in particular requires three SVGs (Scalable Vector Graphic): one for the breadboard view (that is, the physical representation of the device/compontent), one for the schematic view, and one for the PCB view (which is used for producing the PCB).
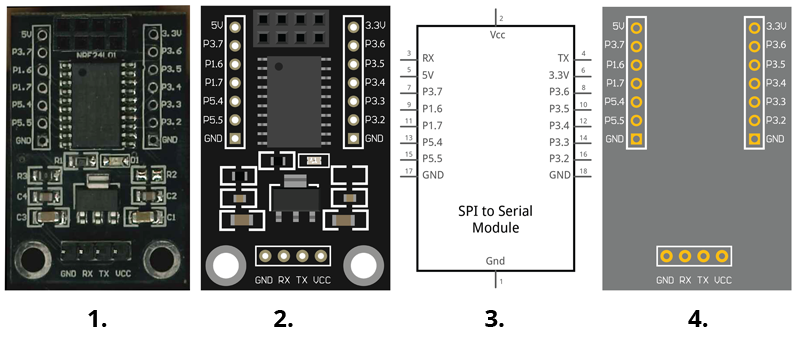
From left to right: 1. the actual module; 2. the breadboard view; 3. the schematic view; 4. the PCB view
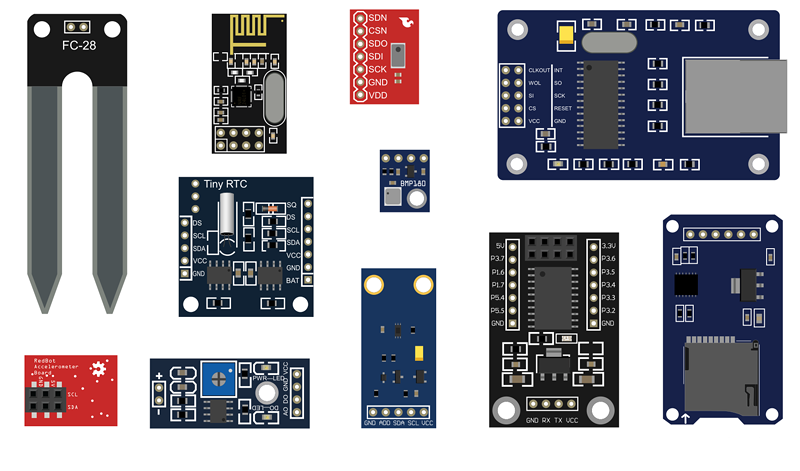
The group of ten boards
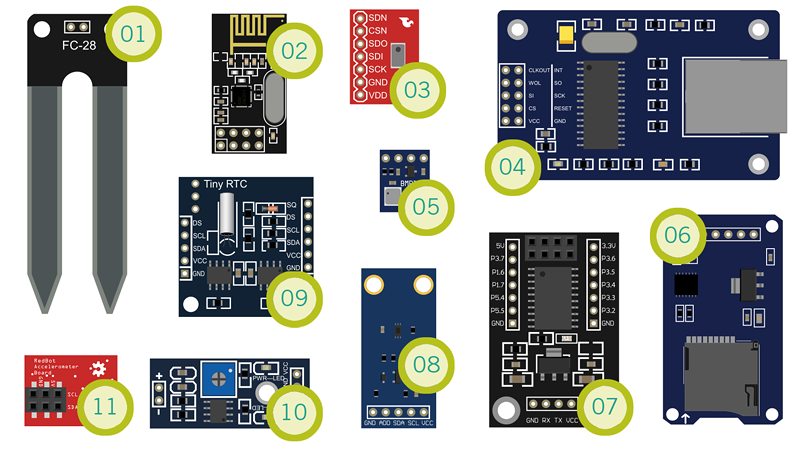
The group of ten boards, numbered
The boards are as follows:
- FC-28 Soil Hygrometer Probe
- NRF24L01+ Radio Transceiver Chip
- MPL115A1 Breakout Board
- ENC28J60 Ethernet Breakout Board
- BMP180 Barometer Breakout Board
- Catalex MicroSD Breakout Module
- NRF24L01+ Serial to TTL Adapter Module
- BH1750FVI Breakout Board (GY-30)
- TinyRTC DS1307 Breakout Board
- FC-28 Soil Hygrometer Board
- RedBot Accelerometer Board
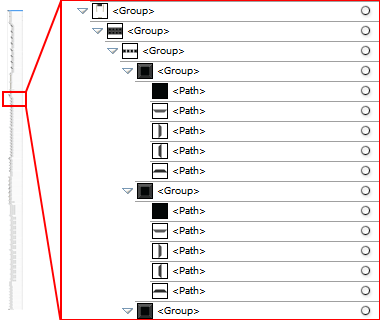
This image gives an idea of how many elements end up in a single part – the box on the right represents a fraction of the overall number of elements. Thankfully Illustrator is quite simple and efficient to use.
The motivation for making these parts was the fact that many of my personal electronics projects required parts that were not available (a fairly common occurrence).
Anyhow, for those interested in making their own, there are a few tutorials available that guide you through the process of making parts for Fritzing; I used the one from SparkFun here: https://learn.sparkfun.com/tutorials/make-your-own-fritzing-parts.
As far as I can tell, the tutorials all give general guidance (e.g. what to name layers, what colours to use, typeface requirements).
I’m currently in the process of submitting these parts to the Fritzing project – hopefully they’ll be available to everyone soon.
Update:
The parts are now available at the Fritzing parts repository (https://code.google.com/p/fritzing/issues/detail?id=2753). The parts are released under the CC BY-SA 3.0 license (https://creativecommons.org/licenses/by-sa/3.0/).
The parts (with their respective links):
- FC-28 Soil Hygrometer Board + Probe
- NRF24L01+ Radio Transceiver Chip
- MPL115A1 Breakout Board
- ENC28J60 Ethernet Breakout Board
- BMP180 Barometer Breakout Board
- Catalex MicroSD Breakout Module
- BH1750FVI Breakout Board (GY-30)
- TinyRTC DS1307 Breakout Board
- NRF24L01+ Serial to TTL Adapter Module*
- RedBot Accelerometer Board*
*Currently finding a proper datasheet for the schematic portion.
Update 2:
- http://forum.arduino.cc/index.php?topic=312700.0
- http://www.reddit.com/r/arduino/comments/31gwx5/sharing_some_fritzing_parts_that_ive_made/
Feel free to leave a note in the comments about how you used the parts. Thanks.