The idea behind this was to see if one could find useful programs in a semi-random way. Randomly generating code isn’t likely to produce usable code, so I decided to try something a bit different: working backwards from something already produced and, essentially, turning things that aren’t programs into programs. In this case, potentially extracting a useful program from a painting that was produced before programming ever existed.
The Language
One of the more interesting programming languages out there is called “Piet,” named after Dutch painter Piet Mondrian by its creator, David Morgan-Mar. Piet programs are bitmaps. The execution of the program is done via a pointer that goes from one coloured region to the next, interpreting it. Piet is an example of an esoteric programming language.
There are 20 colours that are used by Piet:
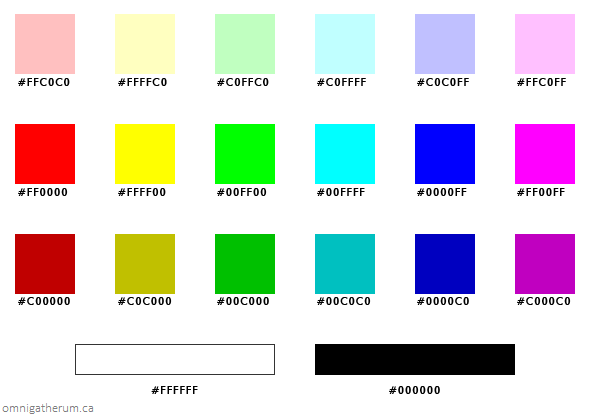
Piet colour palette.
In particular, regarding colour blocks:
“The basic unit of Piet code is the colour block. A colour block is a contiguous block of any number of codels of one colour, bounded by blocks of other colours or by the edge of the program graphic. Blocks of colour adjacent only diagonally are not considered contiguous. A colour block may be any shape and may have “holes” of other colours inside it, which are not considered part of the block.”
To read more about the language, and how it executes, you can read the author’s description of it here: http://www.dangermouse.net/esoteric/piet.html
Choosing the Images:
The paintings were selected due to a number of different factors: having seen the paintings in person, having seen them in courses that I’ve taken (CEH.1-ENx – Explaining European Paintings, 1400 to 1800), and whether the image was in the public domain or not. Because of the latter factor, most of the paintings tend to be older. I decided to include a painting by Vermeer because Mondrian was inspired by him.
The Method of Preparing the Images:
In order for a painting to be executed as a Piet program, it would have to have the appropriate colour palette (some interpreters treat non-standard colours as black, thus preventing or ending execution). The first step is to have a program that takes an image as input and outputs the converted image with the appropriate colour palette.
To do this, I wrote a program in Python which uses a library called Pillow (a fork of PIL). The program finds the closest colour using the Euclidean distance algorithm, since the RGB values can be treated as vectors.
Large images take a long time to convert, so I restricted the largest dimension (i.e. height or width) to 300, 150, and 50 pixels. I used different sizes because of how the resizing process works (generally, the execution results differ at different resolutions).
The program is the following:
#Richard Bruneau, 2015
#omnigatherum.ca

from PIL import Image
import sys
import numpy
import time

maxDimArray = [300,150,50]

piet_colours = [(255, 192, 192),(255, 255, 192),(192, 255, 192),(192, 255, 255),(192, 192, 255),(255, 192, 255),(255, 0, 0),(255, 255, 0),(0, 255, 0),(0, 255, 255),(0, 0, 255),(255, 0, 255),(192, 0, 0),(192, 192, 0),(0, 192, 0),(0, 192, 192),(0, 0, 192),(192, 0, 192),(255, 255, 255),(0, 0, 0)]

filename = sys.argv[1]

#finds closest colour based on Euclidean distance
def get_nearest_colour(b):
    min_dist = float("inf")
    closest_colour = None
    for a in piet_colours:
        dist = numpy.sqrt(sum(map(lambda a,b: (a-b)**2, a, b)))
        if( dist < min_dist ):
            min_dist = dist
            closest_colour = a
    return closest_colour

def convert_image(px,w,h):
    for x in range(0,w):
        for y in range(0,h):
            px[x,y] = get_nearest_colour( px[x,y] )

#resizes image such that the longest dimension == maxLength
#then, convert colours
def process_image(maxLength, img):
    maxDim = 0 #0 or 1, width or height
    maxDims = [0,0]
    if(img.size[0] < img.size[1]): maxDim = 1
    maxLength_percent = (maxLength/float(img.size[maxDim]))
    maxDims[maxDim] = maxLength
    maxDims[1-maxDim] = int((float(img.size[1-maxDim])*float(maxLength_percent)))
    img = img.resize((maxDims[0], maxDims[1]), Image.ANTIALIAS)
    px = img.load()
    convert_image(px,img.size[0],img.size[1])
    img.save( ".\\converted\\" + str(filename[:-4]) + "-conv-" + str(maxLength) + ".png", "PNG" )

start_time = time.time()

#opens the image, and converts immediately from RGBA to RGB
img = Image.open( str(filename) ).convert("RGB")

#img.size[0] is the width of the image
#img.size[1] is the height of the image
print("Format: " + str(img.format) )
print("Mode: " + str(img.mode) )
print("Info: " + str(img.info) )
print("Width: " + str(img.size[0]) )
print("Height: " + str(img.size[1]) )

for length in maxDimArray:
    process_image(length, img)

img.close()

print("--- %s seconds ---" % (time.time() - start_time))

print("End Of Processing.")
(I should note that there are a couple of ways that the above program could be optimized – e.g. memoization.)
I used a simple shell script to process the entire folder, instead of going image by image:
for f in *.png; do
	python script.py $f;
done
Execution Process:
I used the npiet interpreter (version: 1.3a-win32) written by Erik Schoenfelder (found here: http://www.bertnase.de/npiet/). The interpreter provides console output for the status of execution, and as an option, a trace image showing where the pointer went in the image.
The Results of Execution:
Each painting will have its title as the heading, and a more detailed citation at the bottom of the page. Below the image there will be the results of running the image through the npiet interpreter. There are three different image resolutions that were used (largest dimension was 300, 150, and 50 pixels) – each program is described for results from each resolution.
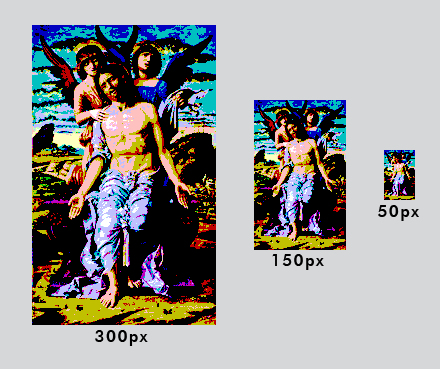
Three sizes of images – 300, 150, and 50 pixels on the largest dimension.
Scenes from the Life of Saint Nicholas of Bari

The original (left), and converted image.
300px:
Program initially requests char input. Upon being provided char input, the program tries to multiply it (by using its ASCII value) with the top value in the stack – this fails with a stack underflow error (since the stack has only one item at the beginning of the program). After that, it loops: it accepts new char input (1+ chars) and for each individual char it pushes that char to the stack (represented by its ASCII value), after which it adds both items in the stack (previous single value plus current input char, as an ASCII value), thus leaving a single value in the stack. When the buffer is empty, it pauses for new input from the console. One (obvious) use for this program is to add up ASCII values of strings of characters.
150px:
Program initially requests char input. Upon being provided char input, the program tries to multiply it (by using its ASCII value) with the top value in the stack – this fails with a stack underflow error (since the stack has only one item at the beginning of the program). After that it gets stuck in a loop: it tries to multiply the two top values in the stack, which it can’t, due to a stack underflow error, then it outputs the top value on the stack as a number (that is, its ASCII value, since the input was a character). It only successfully outputs once, for the initial value provided at the beginning.
50px:
The program first multiplies the top two values in the stack, which it can’t do, since there’s nothing in it. It then goes into a loop: it accepts input as char from the console (1+ chars) and from there, it first attempts to add the top two values in the stack, but can’t since there’s only a single value (stack underflow error). After that, it outputs the value in the stack as a number followed by another multiply (which fails, because the stack is empty now).
The Birth of Venus
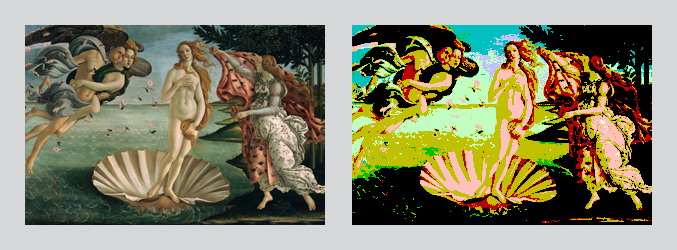
300px:
Program is a loop: it first duplicates the top value on the stack (which fails, since the stack is empty) and then attempts to divide the top two values (specification: “calculates the integer division of the second top value by the top value, and pushes the result back on the stack”), which also fails due to stack underflow.
150px:
The program is a loop. The program first accepts char input (1+ chars), then pushes it onto the stack, then attempts to add the top two values in the stack. This fails the first time, since there is only one value in the stack. After that the programs functions correctly. It seems to be identical in function to the “Scenes from the Life of Saint Nicholas of Bari” 300px program above.
50px:
The program is identical to the 150px one above.
The Man of Sorrows with Two Angels
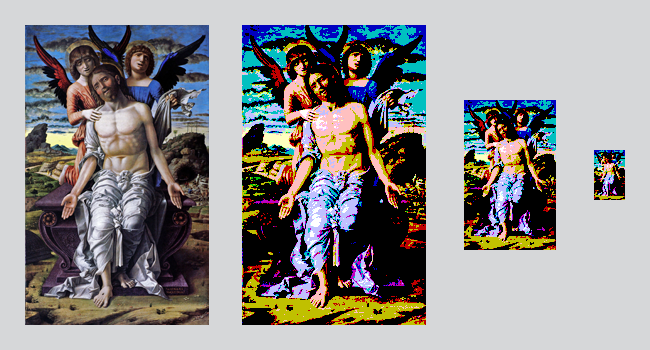
300px:
Nothing happens.
150px:
Nothing happens.
50px:
The program is a loop. The program first accepts char input (1+ chars), then pushes it onto the stack, then attempts to add the top two values in the stack. This fails the first time, since there is only one value in the stack. After that the programs functions correctly. It seems to be identical in function to the “Scenes from the Life of Saint Nicholas of Bari” 300px program above.
The Virgin of the Chancelor Rolin
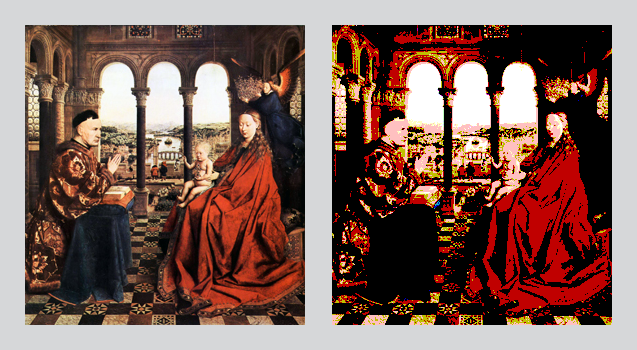
300px:
Does not run, since the first block is black.
150px:
Does not run, since the first block is black.
50px:
The program starts by adding the top two values on the stack, which fails due to stack underflow. It then accepts char input. After two chars are input, the program will then proceed to output (as a number) the sum of the ASCII values. It will then attempt to multiply the top two values of the stack, which fails due to stack underflow. After that, the program enters a loop where it continually accepts char input (1 or more) and adds it to a running total (using the ASCII values).
The Garden of Earthly Delights

300px:
Does not run, since the first block is black.
150px:
Does not run, since the first block is black.
50px:
The program begins by outputting the value at the top of the stack as a number, then outputs the top value in the stack as a char. It then attempts to subtract the top two values in the stack. These all fail, due to stack underflow. Following that, the program enters a loop: it attempts to duplicate the top value in the stack, then divide the top two values, then output the top value on the stack a character, then subtract the top two values in the stack, then duplicate the top value, then divide the top two values, then output the top value on the stack a character, then output the top value on the stack a number, then divide the top two values.
Woman in Blue Reading a Letter
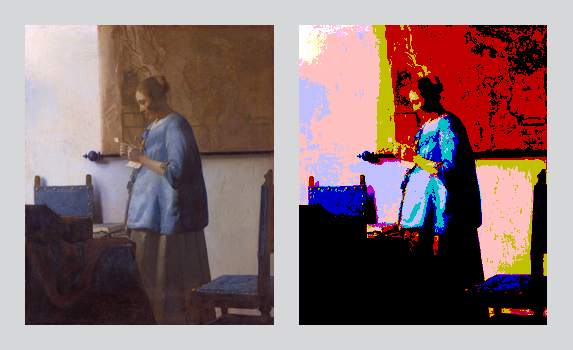
300px:
The program starts by accepting character input (one char) then adds the top two vlaues in the stack, which fails due to stack underflow. It then accepts an additional character input, adds it to the previous character’s ASCII value, then attempts to add the top two values on the stack (which fails due to stack underflow). After that, it pushes the value of the colour to the stack, then it cycles between accepting character input and numeric input.
Paintings:
Scenes from the Life of Saint Nicholas of Bari, a predella of: Fra Angelico. The Virgin and Child Enthroned with Angels and Saints. 1437-1438. Triptych. Galleria Nazionale dell´Umbria, Perugia.
Botticelli, Sandro. The Birth of Venus. c. 1486. Galleria degli Uffizi, Florence.
Mantegna, Andrea. The Man of Sorrows with Two Angels. c. 1500. Statens Museum for Kunst, Copenhagen.
van Eyck, Jan. The Virgin of the Chancelor Rolin. c. 1435. Musée du Louvre, Paris.
Bosch, Hieronimus. The Garden of Earthly Delights. c. 1500. Museo Nacional del Prado, Madrid.
Vermeer, Johannes. Woman in Blue Reading a Letter. c. 1663. Rijksmuseum, Amsterdam.
Sources:
http://en.wikipedia.org/wiki/Esoteric_programming_language
http://www.dangermouse.net/esoteric/piet.html
Interpreter:
http://www.bertnase.de/npiet/
Library:
http://python-pillow.github.io/
Additional Images:
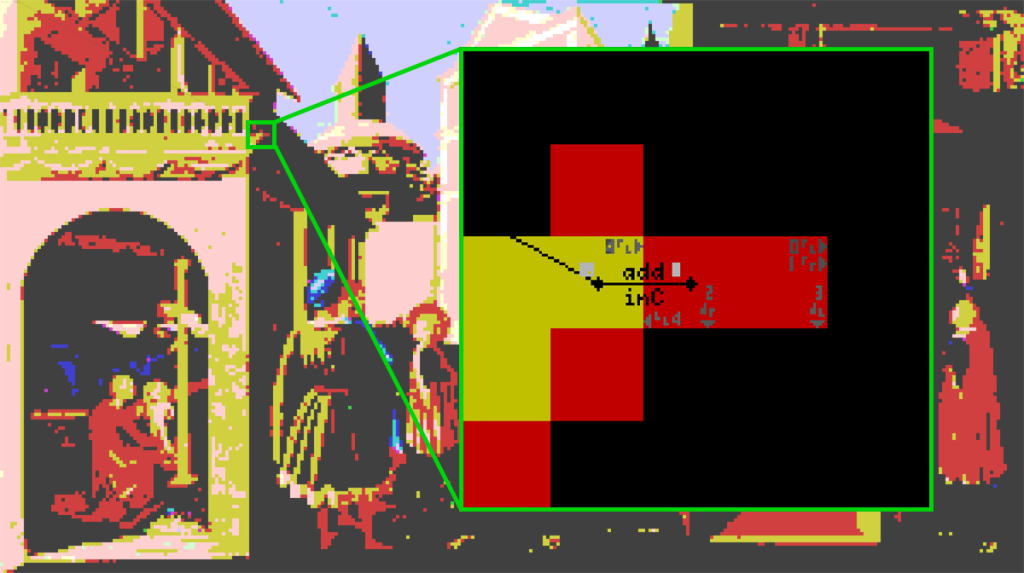
A detail image of the program trace in “Scenes from the Life of Saint Nicholas of Bari.”

A detail image of the program trace of the “The Man of Sorrows with Two Angels.” The trace starts at the top right of the full image, which is the top right in the detail.
